Mortise and tenon joint
T-intersection · Hidden · Hand or power · Difficulty 3/5
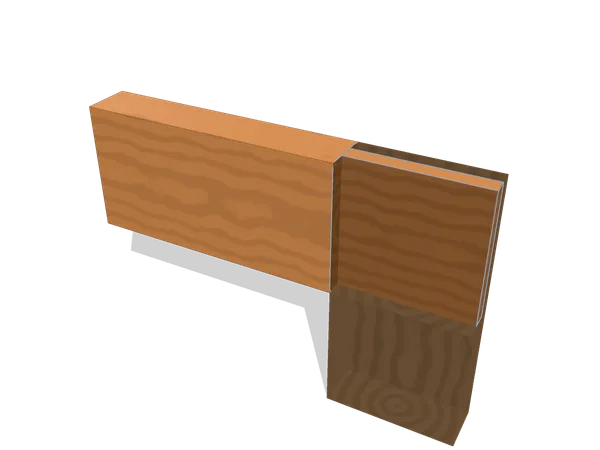
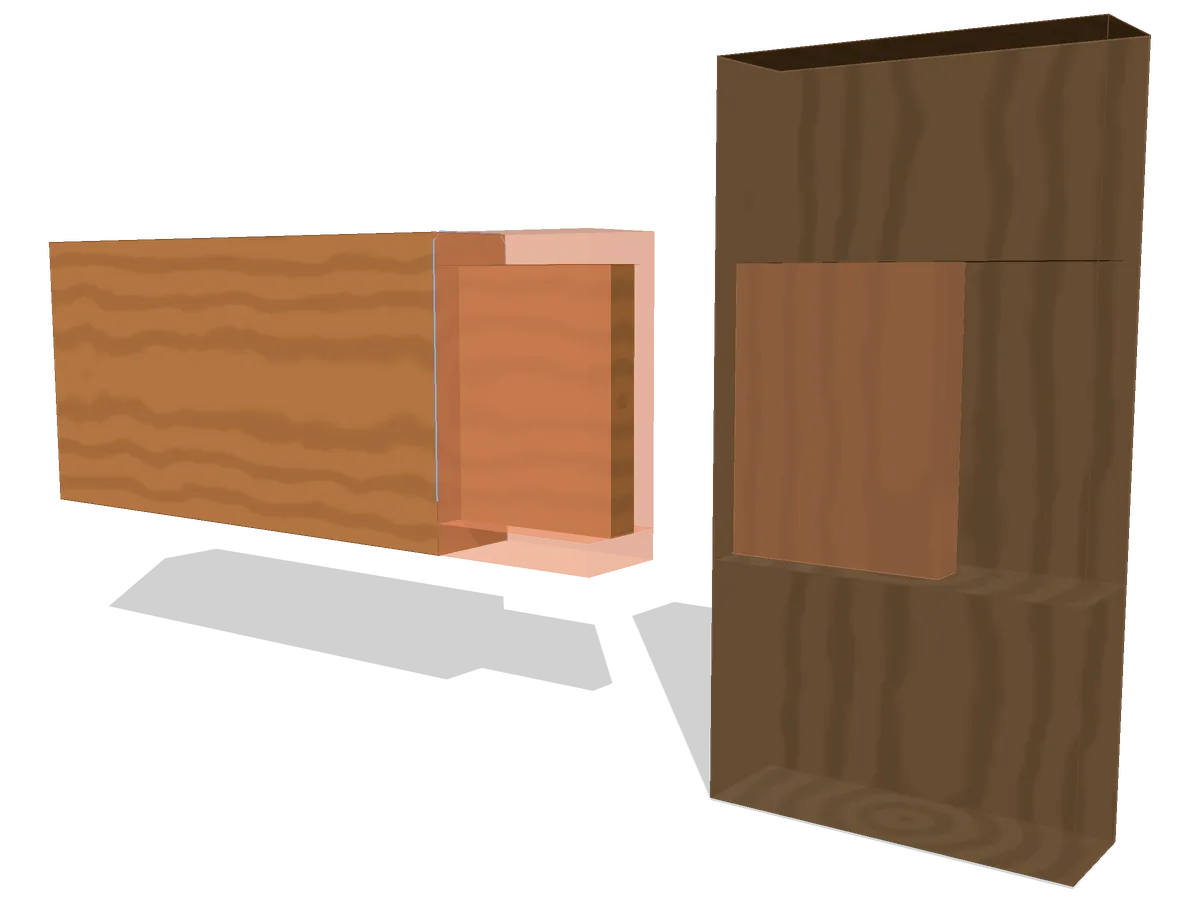
A mortise and tenon joins the end of one piece into the face or edge of another: a rectangular tongue cut on the rail, the tenon, fits a matching hole in the stile, the mortise. Flat shoulders around the tenon land on the stile and are what keep a frame from racking out of square.
The 3D viewer stopped.
Mark out (1 of 4)
- Also called
- mortice and tenon, M&T joint
- Family
- T-intersection · socket
- Joins
- the end of one piece into the face or edge of another
- Typical use
- door stiles and rails; table aprons into legs; chair and bench frames
- Holds against
- Racking, Shear (qualitative)
- Difficulty
- 3/5
- Tools
- mortise gauge, mortise chisel or hollow-chisel mortiser, tenon saw, shoulder plane, mallet
On this page
How the parts fit
When the shoulders bed on the stile all round, nothing of the tenon shows and the joint becomes two members meeting.
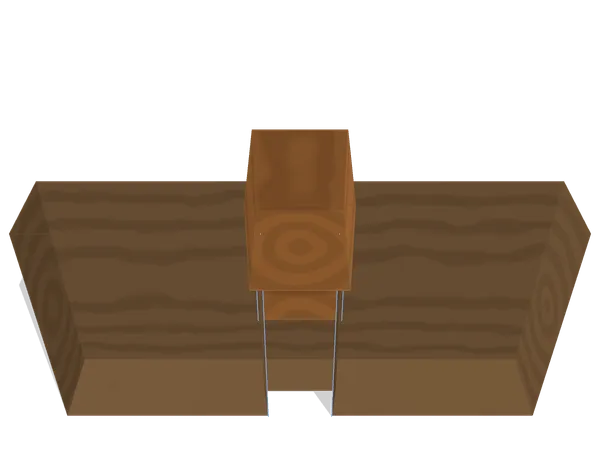
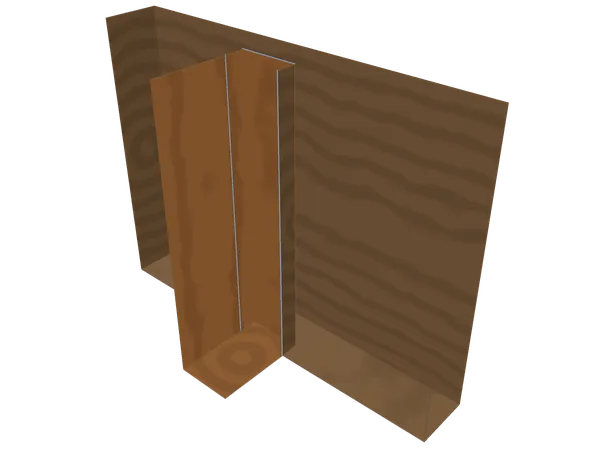
A mortise and tenon is a T or an L between two pieces with different jobs. The rail carries the tenon, a rectangular tongue on its end; the stile carries the mortise, a matching hole in its face or edge. The tenon is normally about a third of the rail’s thickness and centred.
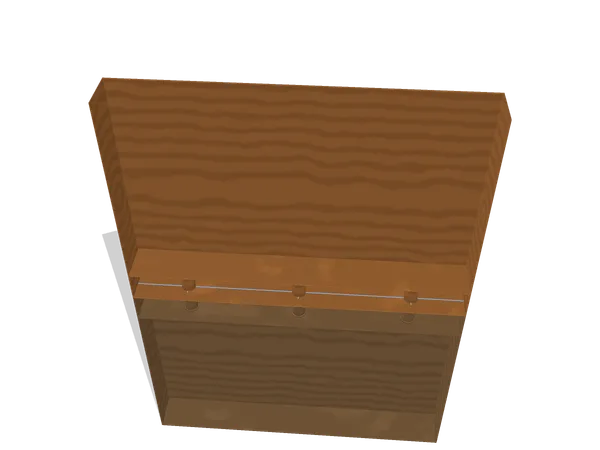
Four contacts, four different jobs. The wide cheeks of the tenon bear on the long walls of the mortise; both run along the grain of their own piece, so this is the pair glue holds. The tenon’s narrow edges meet the mortise ends, end grain on long grain, which locates the rail sideways but adds little. The shoulders, sawn around the base of the tenon, land on the outside of the stile. The tenon’s end should not touch the mortise bottom at all: cut the mortise deeper than the tenon is long, so glue and chips have somewhere to go.
The shoulders are why this joint holds a frame square. Push a frame out of square and the rail pivots on the stile: one shoulder drives into the stile’s face while the opposite tenon cheek levers against the mortise wall. A shoulder with a gap under it lets the frame move before anything resists, and no amount of tenon fit compensates.
The insertion axis is the rail’s own length, straight into the mortise and square to the stile’s face. Nothing resists coming back out along it; that is what glue, a wedge or a drawbored peg is for. Across that axis the mortise walls lock the joint both ways.
When to use a mortise and tenon (and when not to)
Frame corners under racking load are where a mortise and tenon does its clearest work: door stiles and rails, table aprons into legs, chair frames, bed rails, face frames, timber framing. It is hidden, so the surface reads as one clean frame, and it takes seasonal movement well because rail and stile share their grain direction.
Sheet goods rule this joint out first: mortise walls crush and tear in them rather than bear. Leave it alone on rails too thin to give a tenon a third of their thickness without a fragile tongue. It is the wrong family for joining boards end to end or edge to edge. And if the assembly must come apart again, use knock-down hardware, because a glued tenon comes out only by being sawn out.
Layout and cutting, step by step
Nothing is cut yet: the stile shows a knifed rectangle where the mortise will go, and the rail the same width carried round its end.
- Mill the stock, then mark a face side and a face edge on every piece. Every gauge line from here is set from those surfaces, on both parts, or the joint finishes offset.
- Choose the tenon thickness to match a mortise chisel or router bit you own. Set the pins of a mortise gauge to that tool, then set the fence so the lines fall where you want across the rail’s thickness.
- Knife the ends of the mortise on the stile and run the gauge between them from the face side. Without changing the gauge, mark the tenon on the rail’s end and down both faces from the same side.
- Set a marking gauge to the tenon length, a little less than the mortise depth, and knife the shoulder line around the rail.
- Cut the mortise first: chop it with a mortise chisel working outward from the middle, drill out the waste and pare the walls, or rout it. Keep the walls parallel and square to the face, and pare the ends last so you never lever against a finished surface.
- Saw the tenon cheeks on the waste side of the gauge lines down to the shoulder line, then saw the shoulders with the blade registered in the knife wall.
- Flatten the cheeks with a shoulder plane or wide chisel and chamfer the end of the tenon so it starts into the mortise.
- Test-fit dry. The tenon should enter under firm hand pressure and stop with the shoulders just short of the stile; light clamp pressure closes them. If it needs a mallet, it is too fat.
Common mistakes
A shoulder that holds a gap open is the fault worth catching dry, because clamp pressure will close it for as long as the clamps are on and no longer.
Gauging one part from the face side and the other from the back gives a joint that assembles perfectly and sits offset by the thickness error. Mark the faces first and gauge from nothing else. Cutting the tenon first is the next most common: a mortise is a finished dimension the instant the chisel leaves it, a tenon is adjustable, and that order turns every fit into a paring job.
Read the dry fit rather than forcing it. Shoulders that will not close usually mean a tenon bottoming out in a mortise not cleared deep enough, so shorten the tenon before touching the shoulders. A shoulder closed on one edge and open on the other means the shoulder line was not square to the rail’s face, or the mortise not square to the stile’s. A tenon that rattles sideways is narrower than its mortise: glue a shaving to one cheek rather than remake the rail. A joint that squeals going in has one or two proud spots, visible as burnished streaks after a dry push. Pare only those.
Two more ruin good work late: mortising close to a stile’s end without leaving a horn, so the short grain beyond splits out, and flooding a blind mortise with glue, which locks the tenon hydraulically before the shoulders are home.
Mortise and tenon joint vs bridle, dowel and half-lap joints
Choose a mortise and tenon where a corner must resist racking and stay hidden; a bridle, dowel or half-lap trades that shoulder for something simpler.
A bridle joint is the same idea turned inside out: the mortise is cut through the end of the stile as an open slot and the tenon drops in from the side. It is easier to cut accurately because you can watch the fit as you pare, but it shows on two edges and the slot walls have short grain at the corner.
A dowel joint replaces the flat tenon with round pegs. A jig makes it quick and repeatable, but the glue surface is small, much of the rail side is end grain, and there is no wide shoulder bearing to resist racking. It suits light frames and carcase alignment.
A half-lap notches both pieces to half their thickness and overlaps them. The long-grain gluing area is large and the layout is simple, but the joint shows on both faces and reads as an overlap rather than a continuous frame.
Variants
Haunched tenon. A short stub left at the top of the tenon fills the panel groove that runs the whole length of a frame-and-panel stile. The corner shows no open slot and the rail gains bearing against twist.
Wedged through-tenon. The tenon passes through the stile and is split and wedged from the far side, spreading it into a slightly flared mortise. The withdrawal axis is then locked mechanically, and the wedged end grain becomes a deliberate detail.
Loose (floating) tenon. Both parts get a mortise and a separate strip of straight-grained stock joins them. The machining is one operation done twice, which suits routers and slot cutters.
Frequently asked questions
How thick should a tenon be?
About a third of the rail thickness is the usual starting point, then adjust so the tenon matches a mortise chisel or router bit you actually own. When the mortise width and the tenon thickness come from the same tool, the fit stops being a guess. Centre the tenon unless a groove or rabbet in the stile asks you to shift it.
Should you cut the mortise or the tenon first?
Cut the mortise first. Its width is fixed by the tool the moment you cut it, whereas a tenon can be sawn slightly fat and pared down until it slides in. Cutting the tenon first leaves you chasing an exact mortise width, which is much harder by hand or by machine.
Does the tenon have to go all the way through?
No. A blind, or stopped, tenon is standard wherever the joint should not show. A through tenon is chosen when you want to wedge or peg it so the joint holds without relying on glue alone, or when the exposed end grain is wanted as a detail.
Sources and revision history
- Fairham, Woodwork Joints (The Woodworker Series, revised edition), the mortise and tenon chapters — public domain
- Wikipedia: Mortise and tenon (terminology and variants)
Revision history
- Published
- Last updated
Related joints
All wood joints
Every joint on the site, live and planned, grouped by how the pieces meet.
Bridle joint
An open mortise takes a full-width tenon, so the joint is cut entirely from the outside.
Dowel joint
Round pins in matched bored holes register two boards and carry the glue line between them.
Sliding dovetail joint
Tapered tail, matching housing: a shelf goes in from one end and slides home along it.
Dado joint
A flat-bottomed trench across the grain houses the end of a shelf on three sides.